
Sometimes life as “just” a stay at home mom is pretty boring. I very distinctly remember our first 2 years on the field. Not only were they extremely hard (probably the deepest valley we’ve gone through in our marriage), but lonely. I was expecting, like so many other stories I’ve read on here, to be an integral part of our work in East Asia. Right beside my husband (kid on hip..or something), serving, loving, and building community with others.
Our first year those expectations were thrown out the window as we lived off campus, far enough from the students that they didn’t want to make the trek to our home very often. I couldn’t speak a lick o’ the language. I mean, besides “hello,” “bye,” and “I don’t understand.” Literally, that was it. Clearly, that didn’t help me to make local friends. Thankfully, there was another family on the team that we could interact with, but I’m pretty sure they didn’t want to have play dates all day, every day.
By the time our second year rolled around, we had (PTL) moved onto campus, but there was no other family anymore. I quickly learned that I needed people. Daily interaction would be optimal, but at least a few times a week with talking to someone besides my kids and husband. (And team meetings didn’t really count, either.) Getting out was difficult because one, I had a toddler and a newborn. The newbie was attached to me in many ways. Two, we lived in a tiny suburb of our city that had very few places to escape. I mean, unless you count KFC or McDonald’s. I didn’t.
But that second year, I also found a love for time in the kitchen. If you remember the first year, I pretty much hated the kitchen because everything that came out of it was a disaster. After all the flops, though, I learned that I had to keep trying. If not, my family would never know what non-local food tastes like. And, to be honest, it was my 4×7 foot space to escape my kids! It even had a door that I could close to shut out the chaos.
That year, I took a lot of risks in the kitchen. When you take a risk, the outcome can be great or a hot mess. I still had lots of hot messes that year. But, I started having some successes, too. And those kept me going. Time in the kitchen started to give me a new perspective. Even though I was tied to home most days, I could still serve others through my kitchen, and that was life-giving. I even started having students over to learn how to cook simple American foods. Most importantly, I saw that God wanted me involved, too. I just had to wait a while for the reveal to happen.
Some of you may cringe at the thought of being in your kitchen, and that’s ok. I get it. But today I want to share a very simple recipe. Ordinary even. But, it will wow your guests! When it comes out of the oven, you’ll be amazed at how such little effort could create such a beautiful treat. If you’re having a hard time in the kitchen, give this a try and it may just boost your confidence to try something else new!
{What’s a galette, anyway? Yeah, I didn’t know either. It’s basically a free-form tart. If you have a tart pan, by all means use it. If you have a tart pan, I’ll be super impressed that it made the baggage cut. And you must make a lot of tarts. If not, free-form is for you!}
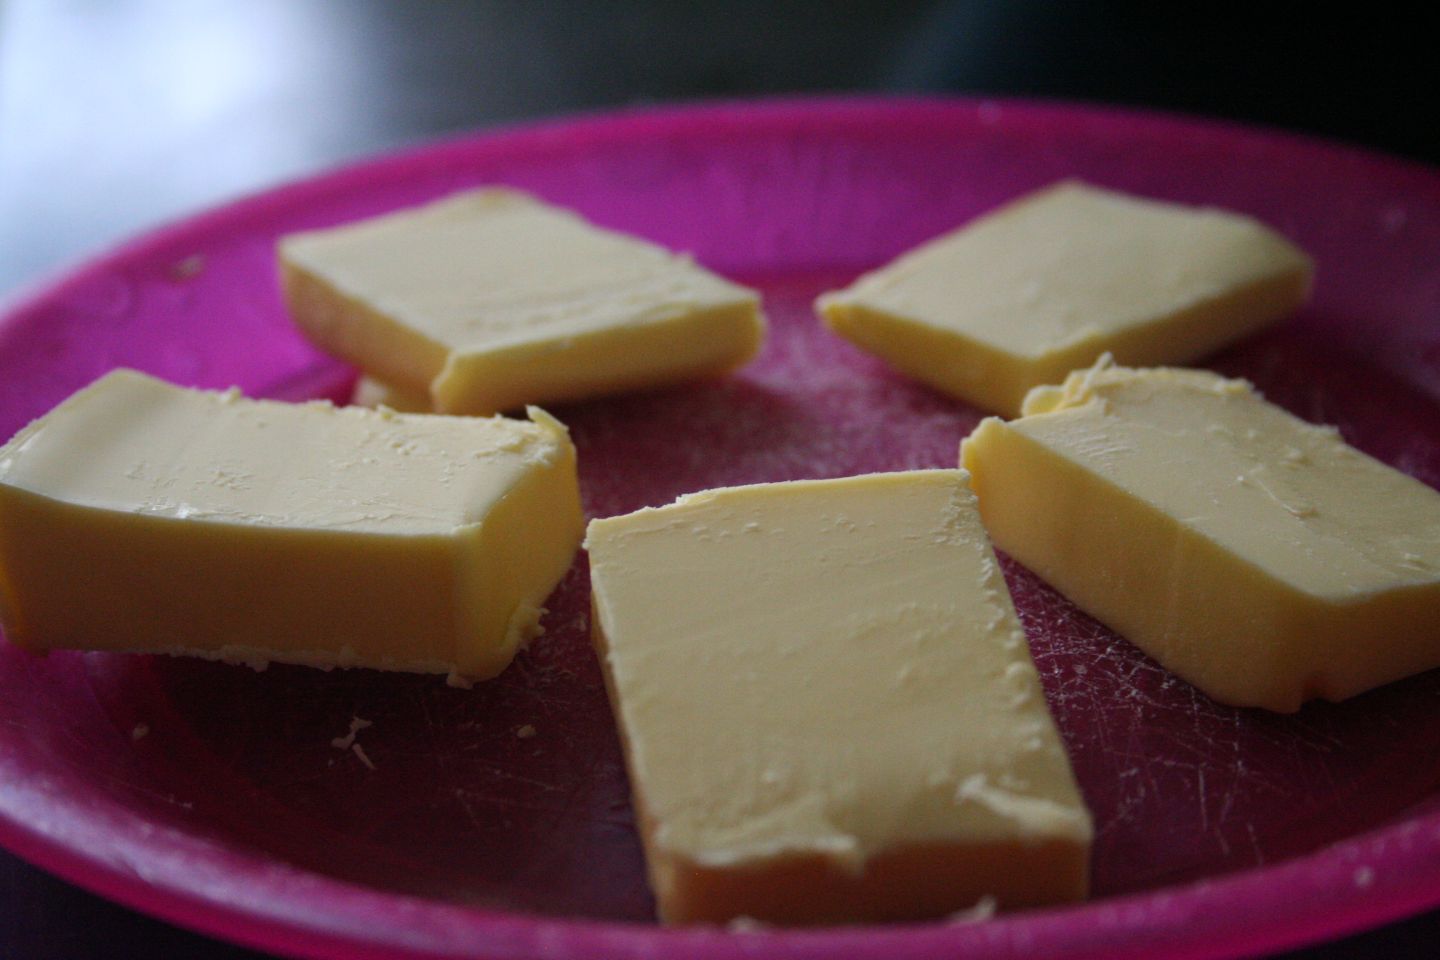
Do you ever wait til the last second to whip something together for your guests coming over in an hour? Me, all the time. A quick trick with butter if you need it to be “softened” is to cut it into chunks, then get the rest of your ingredients together. It should be good to go by then! This avoids having to risk putting it in the microwave and have some holes of melted butter next to still ice-cold parts. Yep, still do that all the time, too.
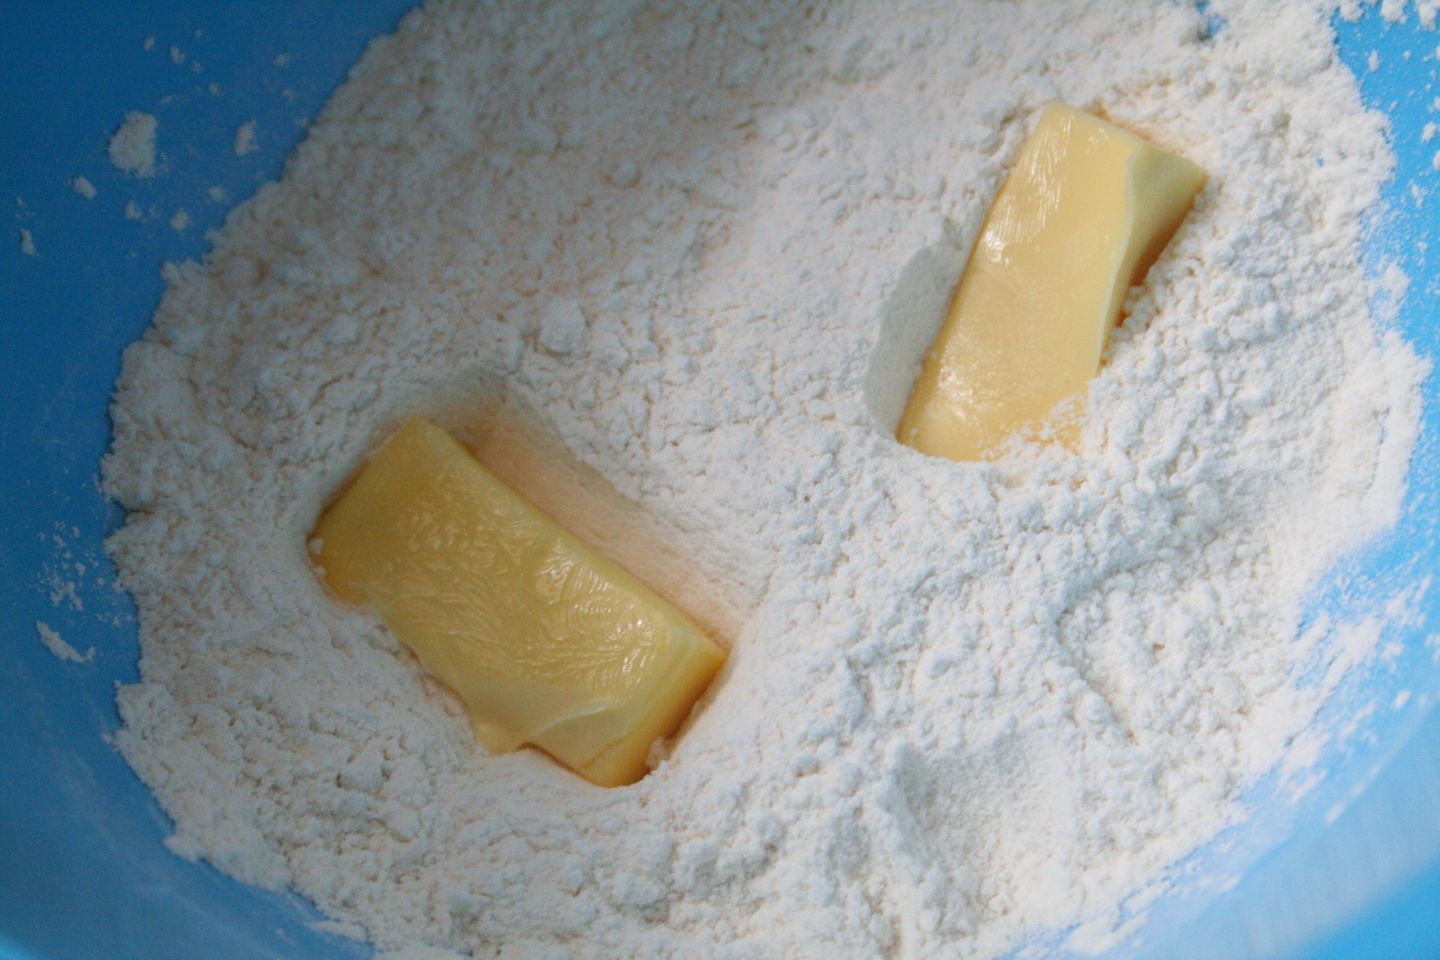
Mix your dry ingredients. (I leave out the added salt if using salted butter.) Butter. I love butter.
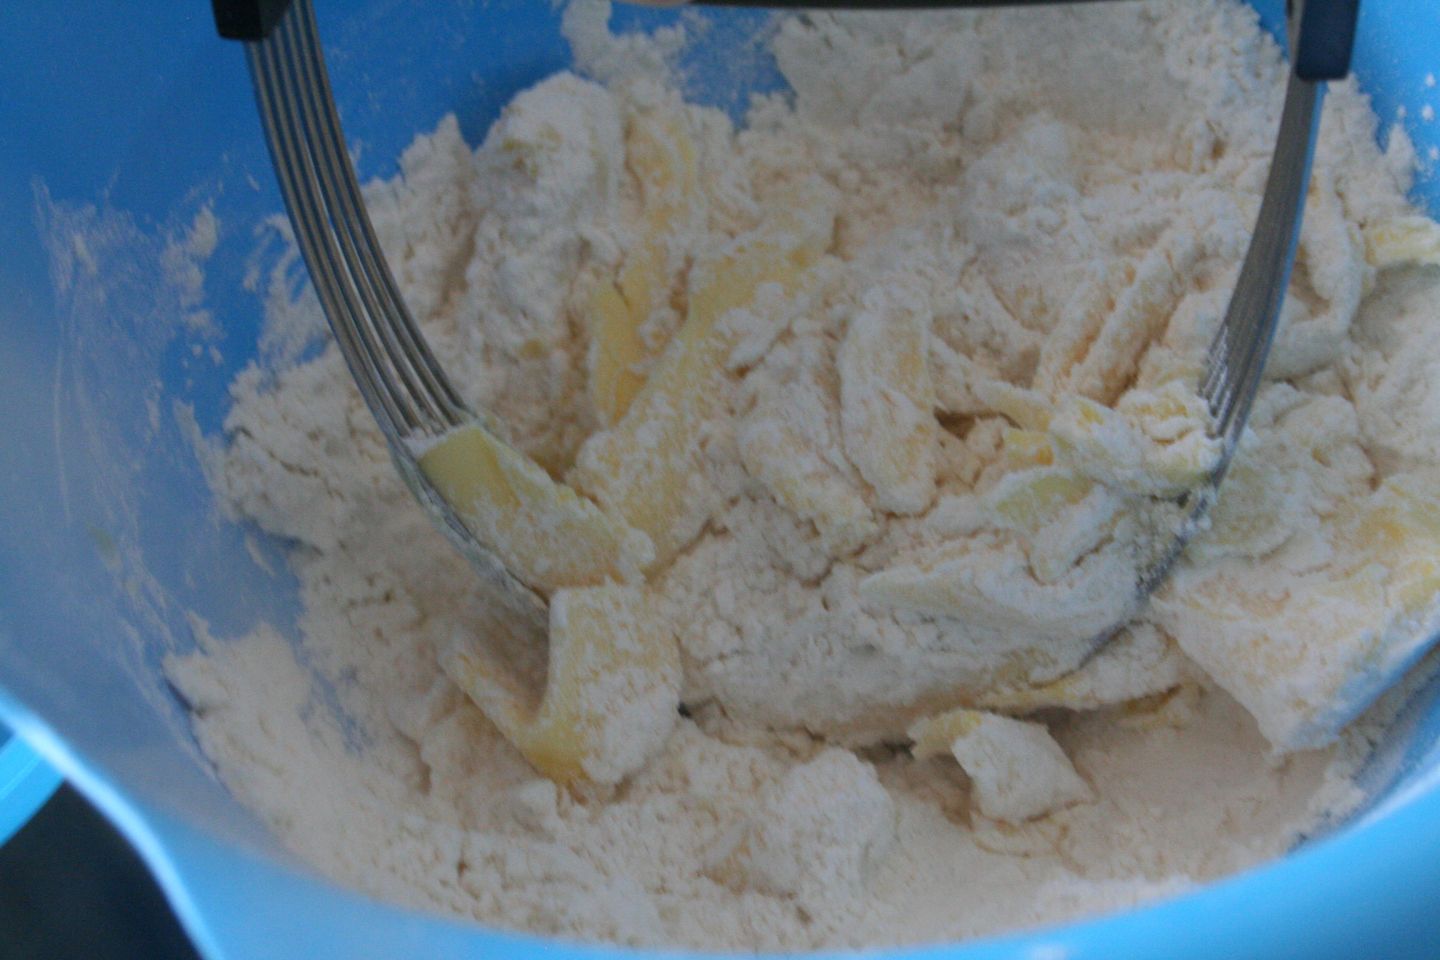
The original recipe says to use a blender, but I don’t think that’s necessary. I love my pastry blender (above), but you could also use 2 knives, a fork, or your hands!

What it should look like before dribbling in the water. (Sorry there’s no pic of that…still working on my skillz.)
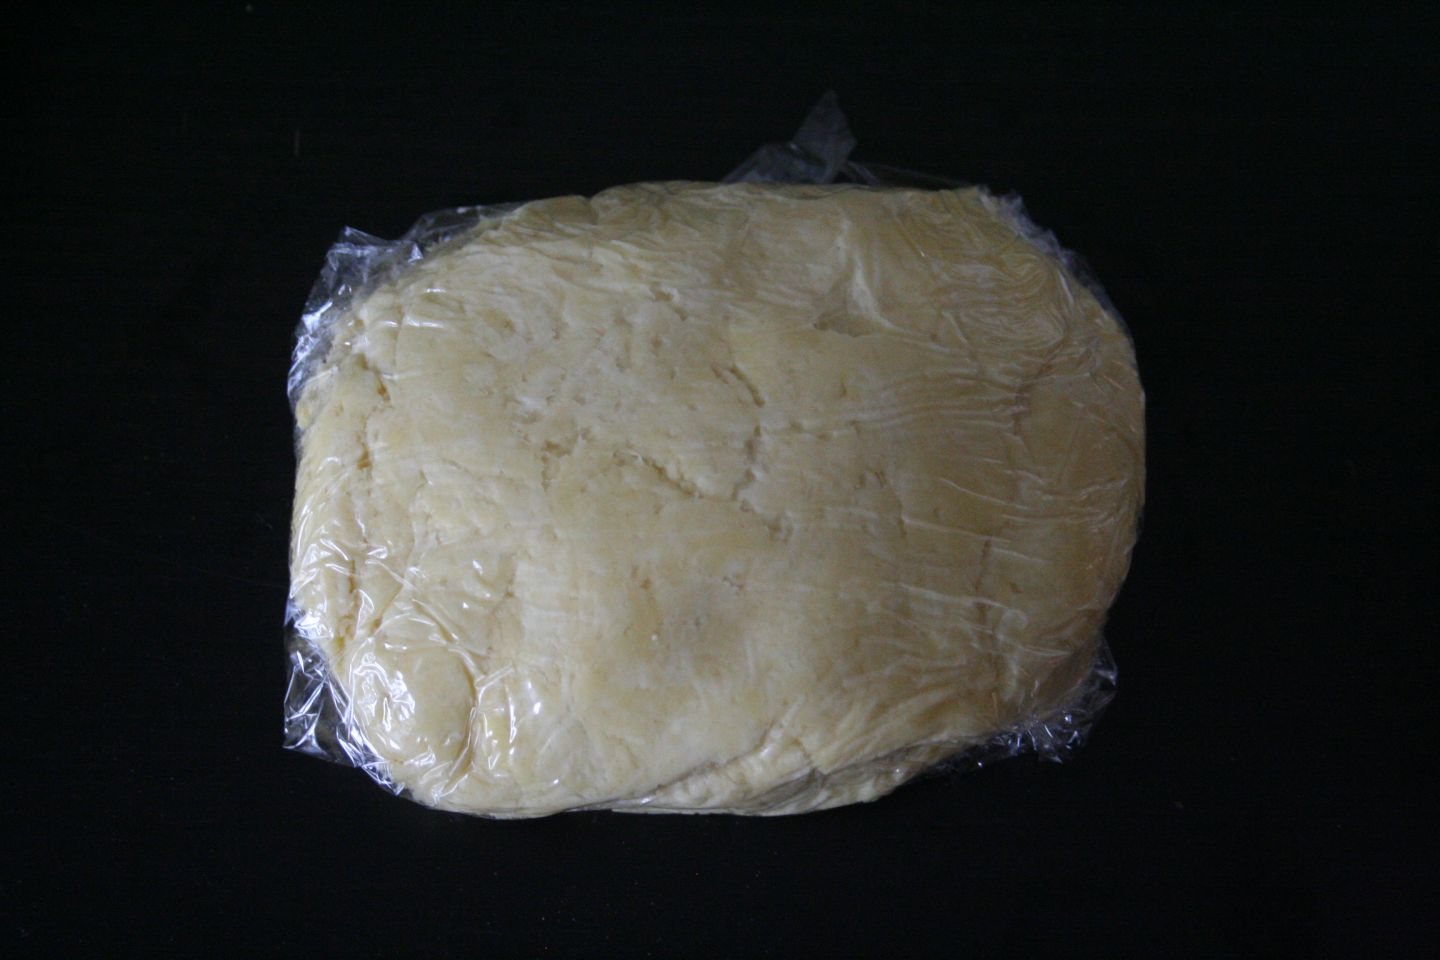
This lump of dough will soon turn into buttery, flaky goodness!
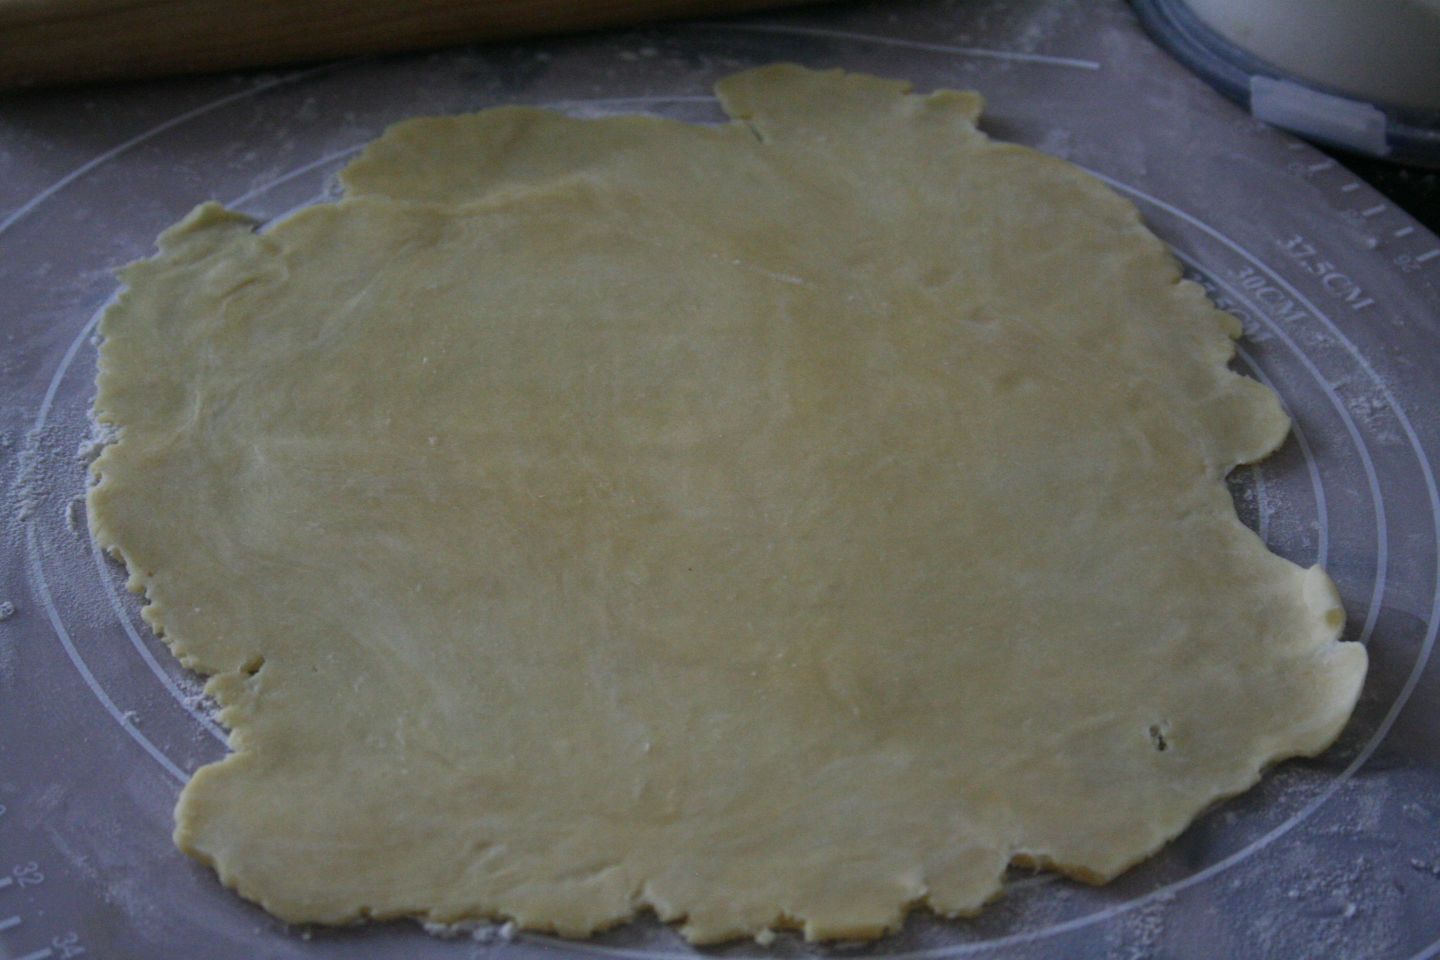
Remember when I said this was free-form? Yeah, this says why. Cracked edges, unevenly rolled, holes. Eh, just go with it…it’ll all get eaten!
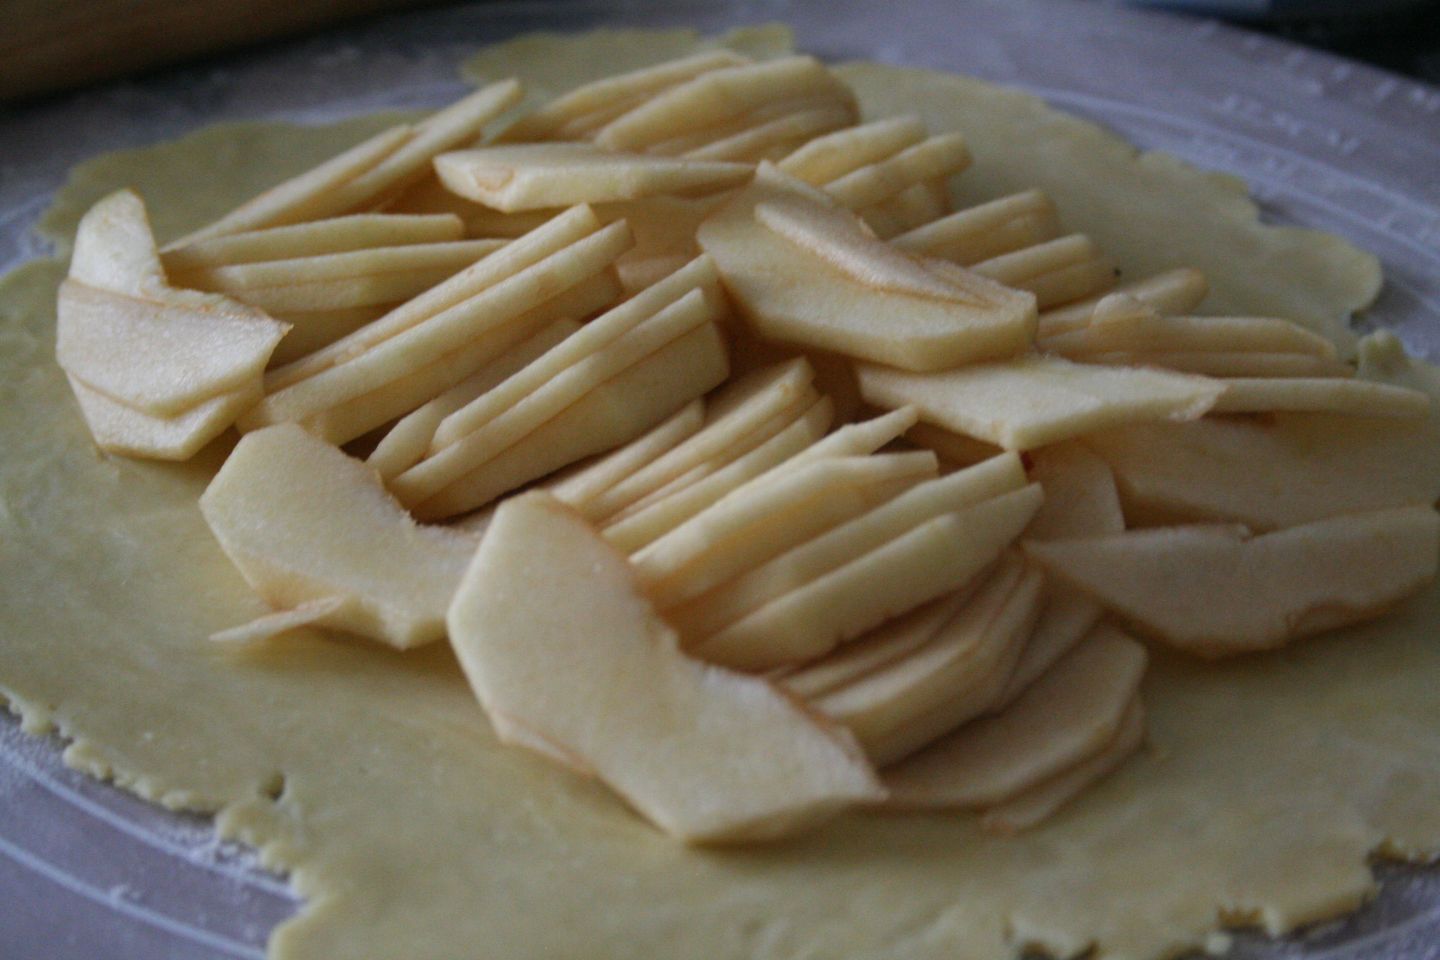
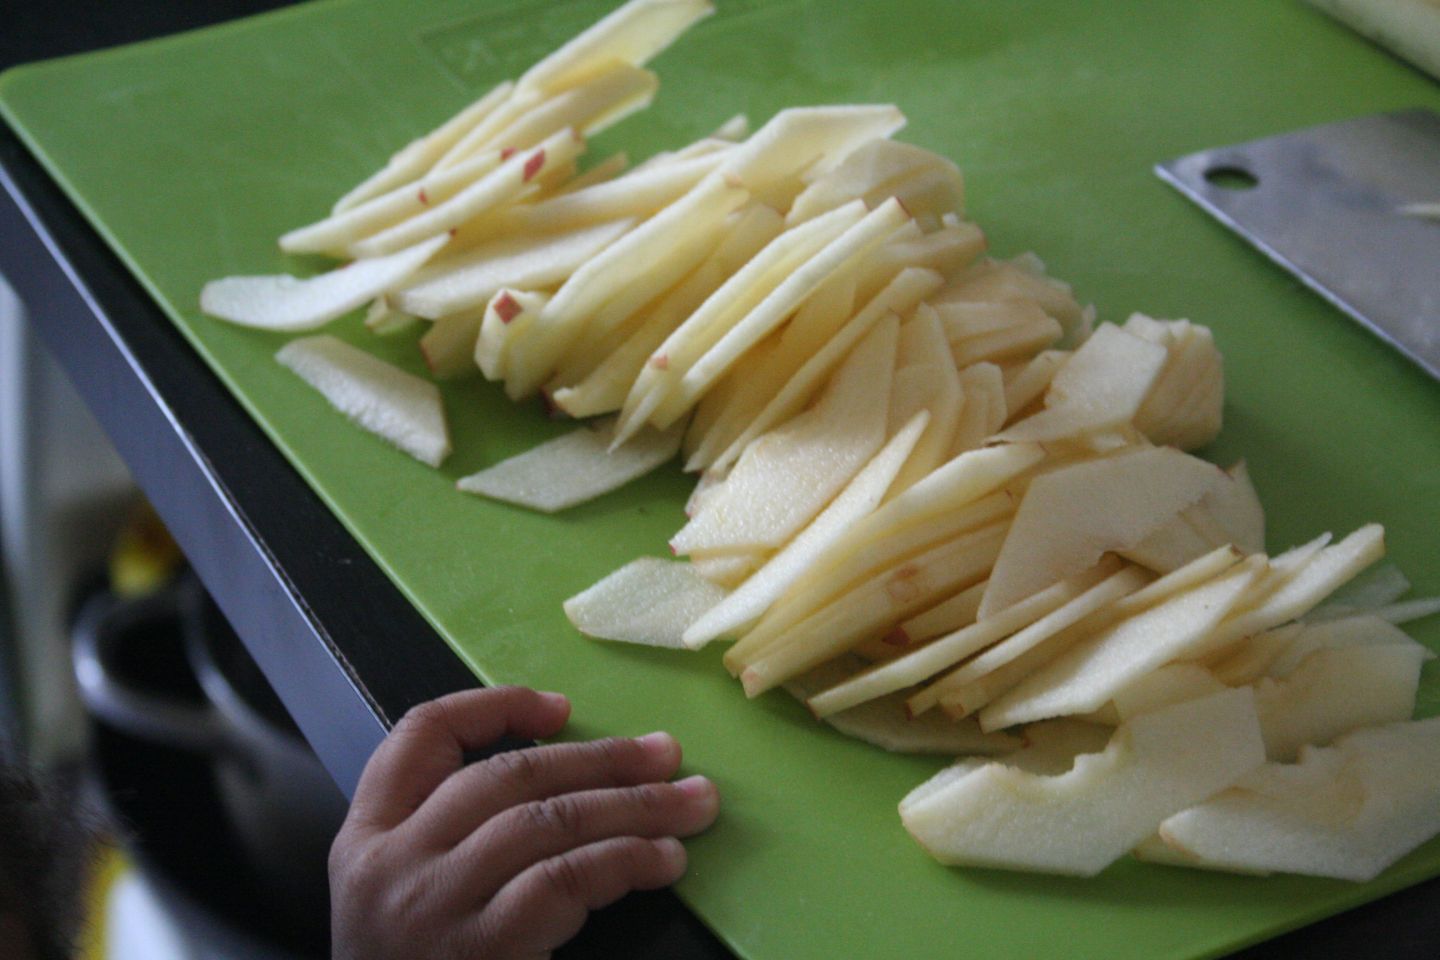
Don’t be like me and pile on all your apples while your dough is still on your mat and not on your pan. I then had to scrape all the apples off, which then made my dough even uglier. Ya’ll don’t mind, though, right?

Since the dough is spread so thin, use this trick to get it to the pan. As you can see, more holes are forming. Don’t panic! The apples will cover all the damage!
My 2-year-old thief. At least it’s the apples he’s trying to steal and not the knife he usually goes for.

I’m sure you can arrange your apple prettier than I did. At this point, I was already running behind in attempting to deliver this to a friend.

Butter and sugar, oh my.
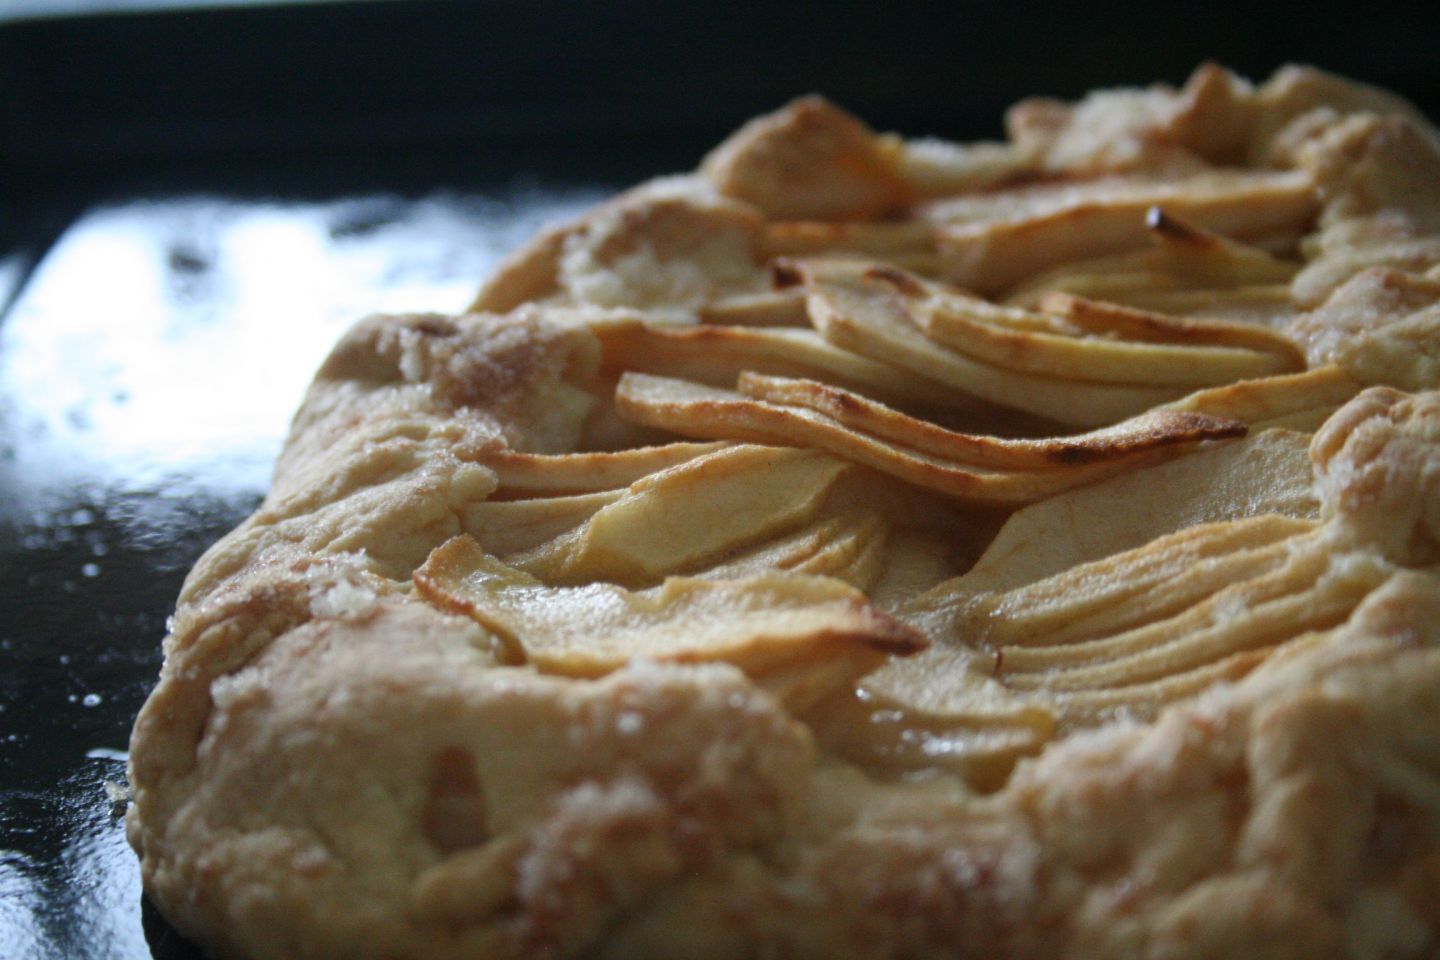
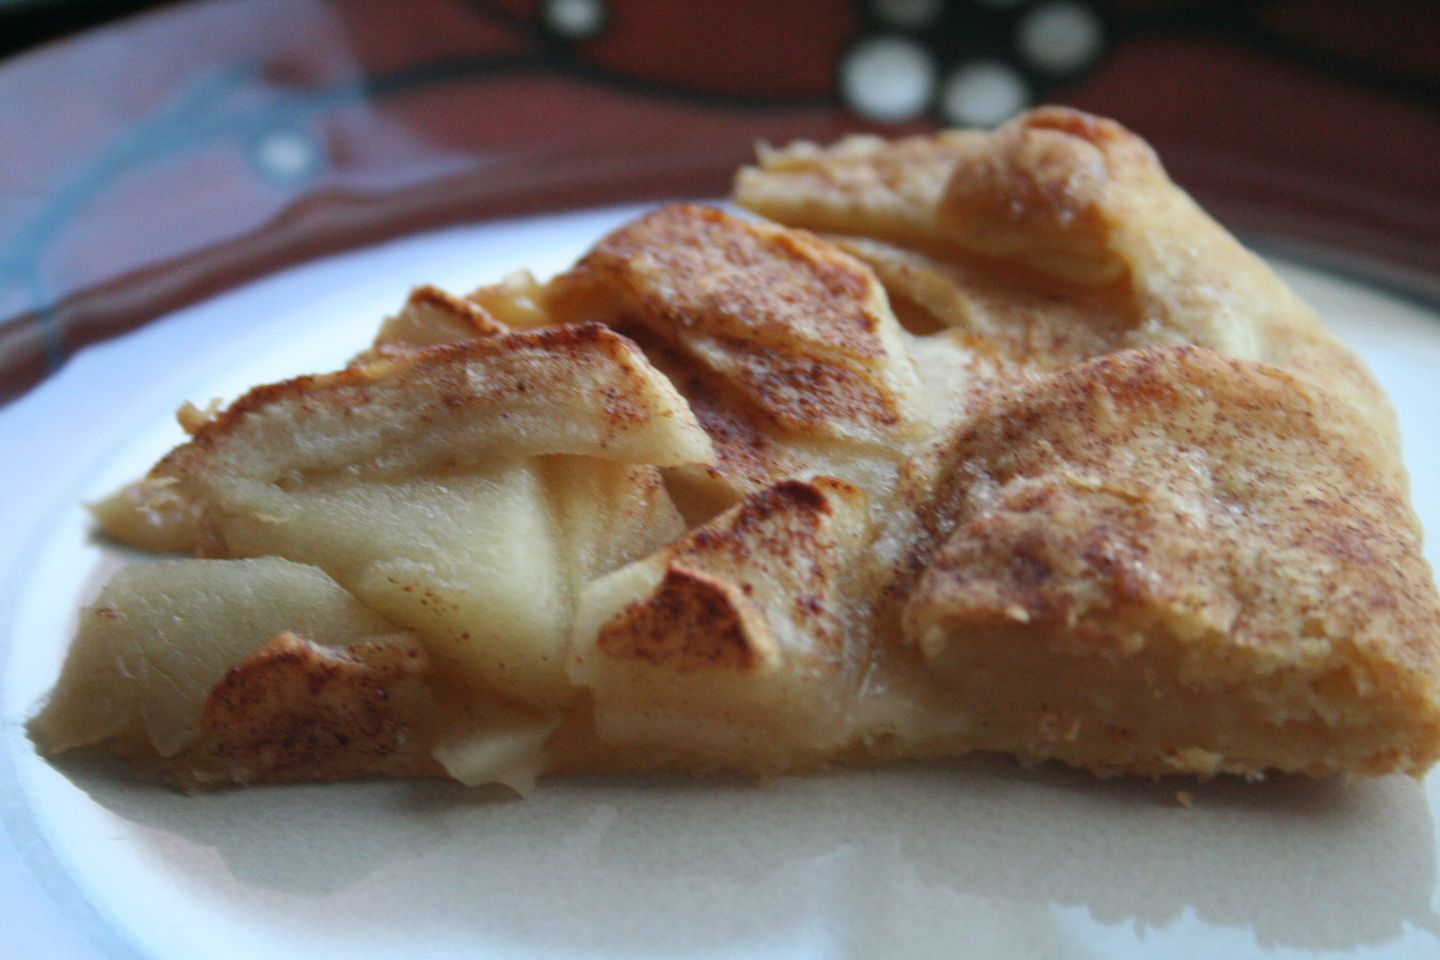
Baked apple deliciousness.
Simple AppleGalette
Time: About 2 hours, including chilling and baking
Serves: 4-6
Adapted from Smitten Kitchen
Dough:
1 cup all-purpose flour
1/2 tsp sugar
1/8 tsp salt (omit if using salted butter)
6 Tbsp (3/4 stick or 85 grams) softened butter, cut into 1/2-inch slices
3 1/2 Tbsp chilled water
Filling:
3 small or 2 large apples, peeled, cored, and sliced*
2 Tbsp butter, melted
3 Tbsp sugar
*If you’d like to make a simple glaze, save the peels and cores. I have never tried it, mostly due to laziness. Check out the original recipe if you want to give it a shot.
Mix flour, sugar, and salt in a large bowl; add 2 tablespoons of the butter. Blend with pastry blender, fork, or hands until dough resembles coarse cornmeal. Add remaining butter; mix until biggest pieces look like large peas.
Dribble in water, stir, then dribble in more, until dough just holds together. Toss with hands, letting it fall through your fingers, until it’s ropy with some dry patches. If dry patches predominate, add another tablespoon of water. Keep tossing until you can roll dough into a ball. Flatten into a 4-inch-thick disk; refrigerate. After at least 30 minutes, remove; let soften so it’s malleable but still cold. Smooth cracks at edges. On a lightly floured surface, roll into a 14-inch circle about 1/8 inch thick. Or something like that–I never measure! It’s free-form, right?!
Place dough on a lightly greased baking sheet. Heat oven to 400°F.
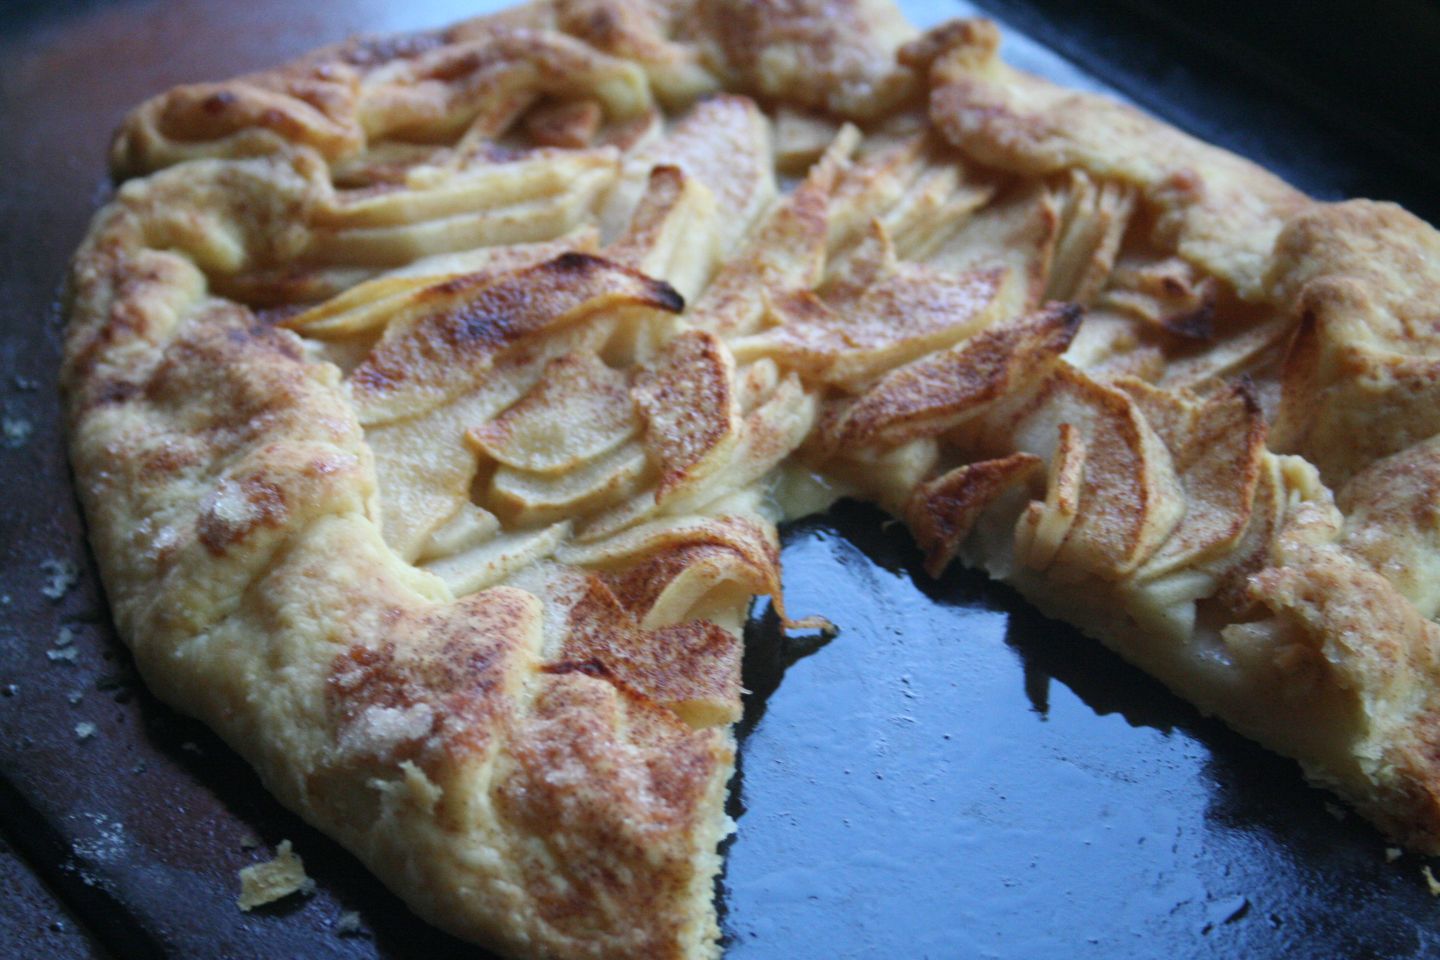
Overlap apples on dough 2 inches from the edge. Make a pretty pattern if you wish. Working your way around the edge of the dough, fold it inward, then make folds as you go around, about every inch or so.
Brush melted butter over apples and onto dough edge. Sprinkle the sugar over the whole thing. Add a dash of cinnamon or nutmeg if you like!
Bake in center of oven until apples are soft, with browned edges, and crust has caramelized to a dark golden brown (about 45 minutes), making sure to rotate it every 15 minutes.
Cut into triangles or rectangles to serve. Enjoy!
Have you tried any of the other recipes posted on here? If so, let us know how it turned out! How did you make it work with where you live?
And what’s your favorite go-to dessert you serve to guests?


16 Responses
I love that your kitchen had a door! Mine does too, and sometimes, I even lock it. 🙂
I see why American homes have big, open kitchens (and I often miss it!!), but man, a door is a great tool to keep the kiddos out!
Haha, I love how you write this (sharing the whole story, thieving two-year-old and re-placing the apples and everything). And, WOW, those pictures. Can’t wait to make this myself.
I just made something vaguely similar in easiness and DELICIOUSNESS. Irish pasties. Think pie crusts wrapped like huge Chinese dumplings around chopped onions, beef, and potatoes (plus salt and pepper). MMMMmmmmmm.
Just tryin’ to be real. 🙂 Irish pasties–gonna have to look that up! Sounds delish! Do you have a favorite recipe you can link?
This is how I make it: http://video.about.com/britishfood/How-to-Make-Cornish-Pasties.htm
p.s. You don’t have to watch the video, the recipe’s written out just below. 🙂
OH MY GOODNESS. The crust is my favorite part! I am definitely going to try these, they look amazing! They are dairy-free too, which is great as I am still nursing and my little boy doesn’t do well when I eat dairy. I am totally rebuilding my go-to recipes since I usually have at least a little dairy in most meals.
Thank you for so much for this. Being in my first year as a m in Kenya, it’s encouraging to know that I’m not the only one who has escaped to the kitchen-to feel “normal”, remember home, & have a successful day! No door here though! I look forward to trying the new recipe!
I’m curious what your kitchen even looks like, Amy! When I visited Nigeria, their “kitchen” was a fire pit outside. 🙂
I am quite blessed in the “kitchen dept”-God knew I needed that space! We are living in an apt in the “city” while we build, so I actually have a small oven/stove. Though its taken some time to remember and plan for only 1 item in the oven at a time, I am SO grateful for my oven!!!!
My greatest love these days is for recipes that don’t need things which are not relatively easily available here in China. While butter is occasionally a real challenge, it is normally available easily enough, and everything else is. Thank you for sharing this wonderful recipe with us!
Jennifer, I know how you feel. Our first city (large town?) was like that. They occasionally sold butter, but it seemed like whenever you needed it, it was conveniently off the shelves! Hope you enjoy this recipe!
We ate Chinese until we started to cringe in those early years. I was trying to learn a language that never did flow from my mouth. We had a helper back in the day when it was affordable which helped me with all the demands and activities I was experiencing. I taught her to cook many dishes but I still loved being alone to cook too. Restful and anchoring. My kids were 3 teens and 2 babies a little more than a year apart.
Wow, Linda! What a full house! So cool that you taught your helper how to cook some things–I’m always so selfish, wanting our helper to teach me all her dishes! I should turn it around sometimes…
I love the idea of tart pans and baggage cuts… had me laughing trying to envision the packing adventure where the tart pan made the cut
Totally made this for breakfast… It’s not that sugary! 😉 I did make the glaze- it wasn’t too hard, but my husband and I were too impatient to wait for the glaze to finish, so it only got on the last two slices… Note to self: finish the glaze before the tart finished! 🙂